Getting Started
-
Install jupyter notebook with Anaconda or PIP. https://jupyter.org/
-
In terminal got to an empty directory and enter: $ jupyter notebook.
-
A “localhost:8888/tree” page will be created in the browser (Whatever is open).
-
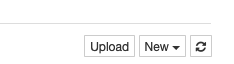
Create new notebook by clicking “New” button on top left of the newly opened page.
-
Select “Python Root” or “Python 3”.
-
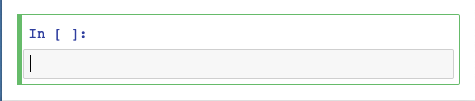
An “In [ ]:” field should appear.
-
If doing this for the first time, select the “User Interface Tour” by clicking the “Help” button on the top of the page.
-
See the Keyboard shortcuts clicking “Help” button and selecting “Keyboard Shortcuts’.
-
Hit “Enter” key or click into a cell to go into “Edit” mode, cell will outline to green.
-
Hit “Esc” key to go into “Command” mode, cell will outline to blue.
Example Code
-
Click into cell and type python command:
“print(‘Hello World’)
-
Execute code by clicking “Cell” on the top of the screen and select, “Run Cells” or one of the other run options.
-
Create new cell by clicking “Insert” at top of screen.
-
Create a variable and set value:
name = ‘Joe”
-
Create another new cell and reset the variable value:
name = ‘GI’
-
Play with “Run Cells”, “Run Above” and “Run Below” and see what happens.
Create Markdown Text as a Heading
-
Insert cell above top cell.
-
Click “Cell” at top of the page and select “Cell Type” -> “Markdown”.
-
Paste in this text and see what happens:
# Sample Headline
*Note: This text will be italicized. *
## Another Headline (H2)
This is a normal paragraph. Now for some Lorem Ipsum. Lorem ipsum dolor sit amet, consectetur adipiscing elit, sed do eiusmod tempor incididunt ut labore et dolore magna aliqua.
Basic formatting of *italics* and **bold** is supported. This *can be **nested** like* so.
### What this notebook shows
1. How to get started with notebooks
2. How to execute code
3. How to add markdown
4. And.. other stuff